Thursday, 11 December 2014

DRAWING CHALLENEGE : SKELETON

This week my challenge was to produce a drawing of a skeleton from front back and side to correctly show proportions and form. before doing this I did some research and looked at Leonardo da Vinci's anatomical drawings and decided to replicate some of these. 


DA VINCI RESEARCH 1.

DA VINCI RESEARCH 2.

DA VINCI RESEARCH 3.

DA VINCI RESEARCH 4.

DA VINCI RESEARCH 5.

These drawings show different bones that make up the body from different angles. it shows the complexity of things like the feet and how things fit together, I even put together a right front and a right back of a skeleton to show the similarities and differences. I felt this helped me understand some things more and helped me expand on how I draw bones etc. I also helps me understand proportions and how the body works which is the purpose of the whole exercise. 

From here I decided to draw my 3 views of a skeleton. Using the head heights and proportion techniques mentioned in my dwarf drawing. I used a few different source images to create a simple yet effective representation of the human shape in the form of a skeleton.

SKELETON FORM SHEET 1.

SKELETON FORM SHEET 2.

SKELETON FORM SHEET 3.

SKELETON FORM SHEET 4.

I labelled the side profile and front profile differently the front profile shows the main bones and some more complicated ones. I made sure to include all the important bones for concept artists, animators etc. The side profile is labelled with the main joints and what type of joints these are which is also very important. The third skeleton simply shows the measurements and heights I used, they have been changed a little to rectify any mistakes etc.

SKELETON FORM SHEET 5.


GAME : MAYA : REVOLVER

I have decided to make a model of a gun I would like to use in my game. at the moment it is just a visual object and wont be used as a working weapon. I have modelled this in sections and have slowly built up the gun. The gun is based on my Drawing  Challenge of a Futuristic weapon. it is similar in its shape but i have changed details etc to fit in with the steam-punk theme.

GUN CYLINDER AND FRAME.

GUN CYLINDER AND FRAME.

GUN CYLINDER AND FRAME.

Here is an example of one of the sections I made. This is the cylinder and frame. it is important because it has a part that will eventually move so is needed to be kept separate (the cylinder inside the frame) my gun is based on a revolver so this will revolve when used. but for now this isn't important it just needs to be kept separate.  Here is the full gun de-constructed into its main parts. 

GUN CYLINDER.

GUN FRAME.

GUN HANDLE.

GUN TRIGGER.

GUN BARREL. 

GUN SIGHT.

GUN MELEE BLADE.

I put all these parts together to create the final gun. 

GUN DE-CONSTRUCTED.

GUN 1.

GUN 2.

GUN 3.

I'm happy with this modelling. It may present a high poly count but the shapes I had to make for this were very different to what I have produced before. the handle in particular was Tricky.


Wednesday, 10 December 2014

GAME : MAYA : LEVEL


 I have been making my game in Maya, with the view to import it into unity. the moving parts and props will be imported separate and placed but I have taken a few screenshots to show a progression. 

STREET 1.

These are the main buildings in my street, I have kept them relatively simple but have added two walkways, bay window sections and curved rooks. I have also made the street lams hang from the buildings. in between the two sets of buildings will be the main street. around the backs will be the back alleys where the generators will be situated. 

STREET 2.

STREET 3.

STREET 4.

STREET 5.

After this I added the Floor / road this would compromise of a base level as the road height. A level as the alley height and a level made of 3 sections as the pathway.

 
STREET 6.
This shows the road and pathways and also the placement of the fence and gate. this is where the player gets into the back alleys. 

STREET 7.

I finally added a outer border to cut off the map. In the alleys it would be the back of houses, at the ends of the street it was the front of more houses and a large closed gate at one end.

STREET 8.

STREET 9.

STREET 10.


MAYA : GAS PUMP

I have Been Given the task of Making a Gas pump in Maya. I was happy with my modelling of this Item and have started to focus more on efficient use of polygons for this. this is something I  need to concentrate more on my other models. I have also even Started UV Mapping this Model. This is something that isn't my strong point at all but I hope with practice to start doing this more and adding texture to finalise my work. 

GAS PUMP 1.

GAS PUMP 2.

It is a simple model due to the fact that I want to add the details with the texture thus minimising polygons on the actual model. I made sure the measurements and proportions were correct as to be used by a human, e.g. screen height. I used the bevel tool more in this than I usually do and will be doing so in more of my projects. 

GAS PUMP 3.

As i mentioned i am currently in the early stages of mapping the pump, everything is proportioned correctly as far as i can tell and sewn together.


GAME : MAYA : STREET PROPS 3

I have produced a couple of final props one to fill space and add some shapes to my level and one that has a function in the game.

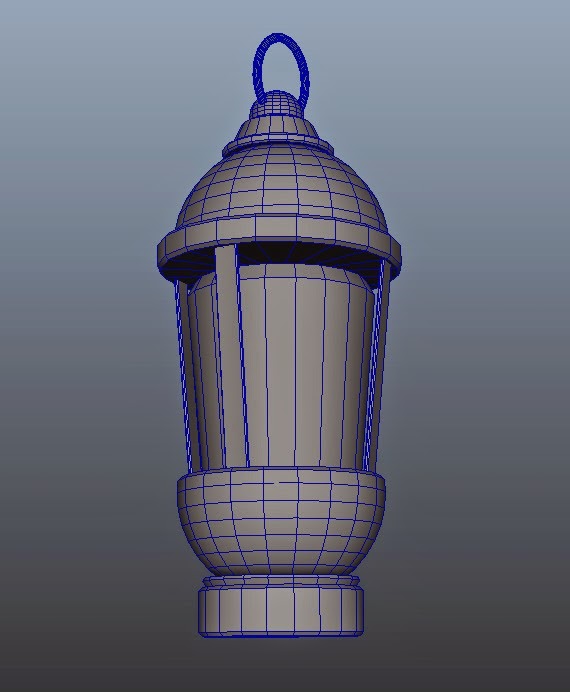
My game being set in a steam-punk abandoned street and the objective being to turn on street lamps by finding generators presents a problem. Its going to be dark. therefore i realised it would be hard to navigate the level without some personal light source, hence i decided to make a Handheld Lamp. i used the same structure as my street-lamps. the idea being you find this lamp at the start of the level and pick it up. the lamp will create a local light enough to see a few feet around you but not enough to dispel the dark atmosphere. 

HANDHELD LAMP.

This is my lamp. it is basic but fits what I need. I will have to place a light-source in it in unity and also code the pick up section of the story. 

Secondly I need a space filler, something to break up blank flat walls making the game more visually enjoyable. I realised the sections this was needed in was mainly the back alleys in my game where we find the generators we already have the Smog exhausts mentioned earlier but I need something more basic that I can repeat but place in different ways to fill the space.
 
For this I Decided on an old game favourite, wooden crates. these are easy to make, explain and fill space with a familiar and realistic shape.

CRATE 1.

This is the crate I made. Three panels on each side and a border makes a distinctive recognisable shape. It will fill the space well. I am planning on arranging them in piles to fill more space and create more shapes. I have made an example of one of these piles in Maya. 

CRATE PILE.


Wednesday, 3 December 2014

GAME : MAYA : STREET PROPS

I have carried on making props for my game to visually improve it and to fit the story and style of steam-punk. I realised i will need a fence and gate something to barricade off areas and also to get into certain areas to find the generators mentioned before to power the street lights. the gate will not be locked as it is a derelict street so will just need a push or click to open. 

GAME FENCE PANEL 1.

GAME FENCE PANEL 2.

This is the basic fence panel. I think it fits the style but isn't overly complicated so fits what I need.


GAME GATE.
This is the gate I designed, I needed to keep it similar to the fence so it fits in but differentiates itself from it, hence making it slightly smaller in height and adding more curves. It also fits the theme and isn't overly complicated.

At this stage I had already  made the hinges after looking at a few I chose a simple one which just requires 3 identical parts to rotate on the button press on the gate. there fore swinging the door open if connected to these parts. 

GAME FENCE HINGE.
The ring connected to the gate (right side) merely turns 90-110 degrees around the bar protruding from the fence (left side) this is simple but mechanically should work.

I also Decided to make a prop for the back alleys just to add to the scenery, an element that needs to be dealt with in a Steam-Punk world is smoke, hence I decided to make "SMOG EXHAUSTS"
which in the detailed version of the game would emit smoke as a way of getting rid of it but rather crudely into the alleys and streets. 

SMOG EXHAUST 1.

SMOG EXHAUST 2.


ILLUSTRATIONS : BACKGROUND


I thought it would be helpful to upload what I have done previous to Computer Game Art. I have studied a 2 year Level 3 General Art and Design course where I focused on illustration and in turn started working my way towards my own clothing company based on my illustrations. this is still an aim but is on hold whilst I am concentrating on my Uni Course in CGA. however I have a bulk of artwork built up for this which is a very unique and different style to what I have been producing since September and thought it should be shown to compare and show range. The Company For My clothing range is Monkey Skull Clothing. "For  those of us who love to rock out, and lover to look good doing it" 

So without further ado :

MONKEY SKULL CLOTHING COMPANY LOGO.

This Logo was created in Sketchbook Pro using a scanned in Hand drawn Banobo Skull which I specifically drew for the logo. 


BANOBOSKULL.

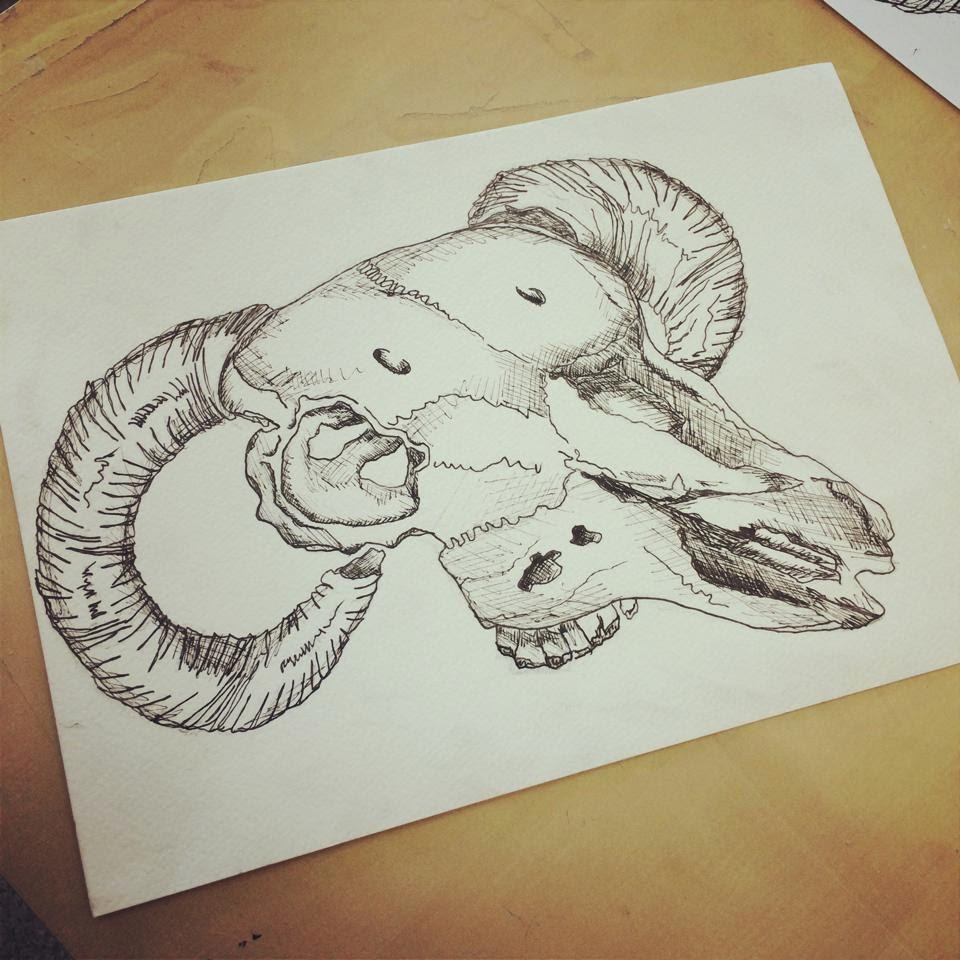
The artwork I produced was all linked as i wanted a range. the range I designed all the artwork was the "skull range" and featured hand drawn skulls of different North American And British Animals, Including Mammals and Birds. All drawn in this style of my own.  


BOARSKULL.

BADGERSKULL. 
RAMSKULL.

BEAVERSKULL.

DEERSKULL.

MOOSESKULL.

DEERSKULL 2.

I also produced some other drawings in this style and some colour skulls aswell.

THE FLY.

HEART ON TISSUE.

COLOUR COWSKULL.

COLOUR MOOSESKULL.

SWALLOW.

REDKITE.

CROW.

RAVEN.